Installing adjustable brake levers on your bicycle can significantly enhance the riding experience by providing better ergonomics and customized control. These levers allow riders to modify the distance from the handlebars, making it easier to engage the brakes without straining your fingers or wrists. Whether you’re a casual rider or a serious cyclist, adjusting your brake levers can improve comfort and efficiency.
This guide will walk you through the process of selecting, removing, and installing adjustable brake levers on various types of bikes. We’ll explore the tools you’ll need, the steps involved in the installation, and tips for ensuring a proper fit. It’s essential to have the right knowledge and equipment to successfully complete this task, as improper installation can lead to suboptimal braking performance and safety concerns.
Before you begin, make sure to choose high-quality adjustable brake levers that are compatible with your bike’s brake system. Understanding your specific bike model and its brake components is crucial for a seamless installation process. In the following sections, you’ll find detailed instructions and important considerations to help you achieve a successful installation.
Choosing the Right Adjustable Brake Levers for Your Bike Model

Selecting the proper adjustable brake levers is crucial for optimal performance and comfort when riding. Begin by identifying your bike model and brand, as compatibility is key. Most bike manufacturers specify whether their frames are designed for certain lever types, which often include road, mountain, and hybrid bikes. Check your bike’s user manual or the manufacturer’s website for detailed specifications.
Next, consider the brake system installed on your bike. Adjustable brake levers are compatible with different brake types, such as rim brakes and disc brakes. Ensure that the levers you choose are suitable for your brake system type. Additionally, pay attention to the lever pull ratio, which determines how much force is needed to activate the brakes effectively.
Lever material and design are also important factors. Adjustable levers are often made from aluminum or composite materials, providing a balance between weight and durability. Opt for a design that offers both functionality and ergonomic comfort, as well-shaped levers can significantly enhance your grip and control. Check for features such as reach adjustment to customize the levers to your hand size, ensuring a comfortable gripping position.
Compatibility with handlebars is another important consideration. Ensure that the lever’s mounting system matches the diameter of your handlebars, typically measured in millimeters. Most common sizes are 22.2mm for mountain bikes and 24mm for road bikes. A proper fit ensures that the levers can be securely attached and effectively used without any compromising ergonomics.
Finally, consider the brand reputation and customer reviews of the adjustable brake levers. Reputable brands often offer warranties and customer support that can be beneficial in case of issues. Reading user feedback can provide insights into durability, performance, and ease of installation, helping you make a more informed decision. By considering all these factors, you can select adjustable brake levers that enhance your cycling experience and ensure optimal safety on the road.
Step-by-Step Installation Process for Brake Levers
Begin by gathering all necessary tools and components. You will need adjustable brake levers, a 5mm hex wrench, a screwdriver, and possibly zip ties if cable management is required.
First, ensure your bike is securely positioned in a stand or on a flat surface. This will make the installation process easier and safer.
Next, remove the old brake levers. Using the 5mm hex wrench, locate the bolt that secures the lever onto the handlebar. Loosen and remove this bolt, then slide the old lever off the handlebar. If your bike has a clamp-style brake lever, you may need to loosen a second bolt that secures the cable housing.
After removing the old lever, take your new adjustable brake lever and position it on the handlebar. Ensure it is aligned properly and at a comfortable angle for your hand. If the lever has an integrated clamp, ensure it is positioned tightly against the handlebar.
Once the new lever is in place, use the hex wrench to tighten the mounting bolt securely. Avoid overtightening, as this can damage the handlebar. Make sure the lever operates smoothly without obstructing other controls.
Next, reattach your brake cable. If the lever has a cable adjuster, slide the cable through it and ensure it’s seated correctly in the lever. Pull the cable tight and secure it according to your brake system’s specifications.
After the cable is secure, test the brake lever for proper function. Squeeze the lever to confirm that it engages the brake system effectively. Adjust the lever positioning if necessary, ensuring it falls within your hand’s natural grasp while riding.
Finally, clean up excess cable and secure any loose ends using zip ties. Make final adjustments to the brake cable tension if needed, and perform a test ride to ensure everything is functioning correctly.
Fine-Tuning Your Adjustable Brake Levers for Optimal Performance

Once you have installed your adjustable brake levers, the next critical step is to fine-tune them to ensure the best performance. Proper adjustment will enhance your braking efficiency, improve comfort, and provide a safer riding experience.
Start by adjusting the lever reach. Most adjustable levers have a reach adjustment feature that accommodates different hand sizes and preferences. To find the optimal reach, sit on your bike and position your hands on the handlebars. Adjust the lever until it feels comfortable when pulled, ideally allowing your fingers to easily wrap around the lever and providing sufficient leverage without straining your fingers.
Next, focus on the lever angle. This adjustment affects the way your fingers contact the lever during braking. Experiment with different angles while maintaining a natural grip position. Ideally, the lever should be positioned so that your fingers are at a slight downward angle when pulling the lever. This will help promote a more ergonomic pull and reduce fatigue during long rides.
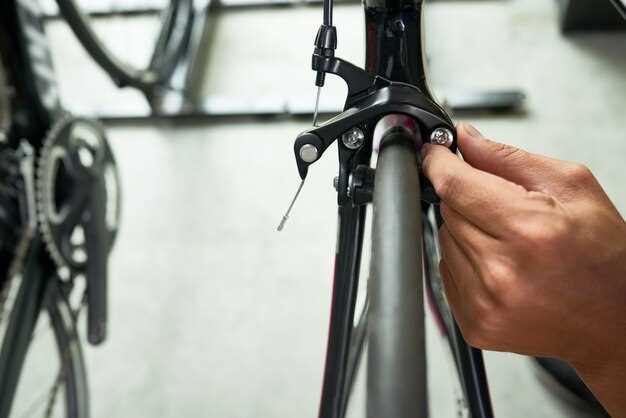
Another important aspect is the brake pads’ contact point. Fine-tuning this involves adjusting the cable tension to ensure the brake pads engage the rim effectively. Pull the brake lever and observe the point at which the pads contact the rim. If the contact is too close to the lever’s handlebar position, you may need to increase the cable tension. Conversely, if the pads are too far from engaging, reduce the tension accordingly.
Regularly check the brake lever for any play or movement. A well-adjusted lever should feel solid with minimal side-to-side play. If you experience excessive movement, this could indicate that the lever is not properly secured to the brake system or that there are issues with the pivot points.
Finally, always test your adjustments in a safe environment before taking your bike out on the road or trails. Perform a few test stops to evaluate the brake feel and responsiveness. Fine-tuning might require several iterations to achieve the desired result, so don’t hesitate to make incremental adjustments until you find what works best for your riding style.

